When it comes to SEO and online visibility, there’s a lot of jargon website owners need to be familiar with. One such term is ‘redirect.’
A redirect is a way to send both users and search engines from one URL to another. This can be useful in a variety of situations, such as when a website changes its domain name or when specific pages have been moved.
There are two main things you need to know about redirects. First, you should be familiar with their types.
Second, you must know of a redirect checker to assess the redirects on your website or that of a competitor.
We discuss both these topics below.
What Are Redirects?
A redirect is exactly what it sounds like — a way to point users and search engines to a URL other than the one they initially intended to visit.
Redirects are an essential part of website management and SEO. Websites commonly use redirects when the web page moves to a new address.
This way, they can ensure that visitors still end up on the correct page and that all of their traffic is not lost.
Besides that, redirects are also crucial for SEO purposes. Search engines use them to pass on link juice from one URL to another.
This means that if a webpage with high rankings is redirected to a new URL, the new page will also benefit from its predecessor’s authority.
Also, redirects allow search engine crawlers to always land on a valid URL, making it easier for them to index the website.
Importance of Redirects
Redirects are important for four main reasons. These include:
- Forwarding traffic to a new URL if the previous URL no longer exists
- Forwarding the authority of a high-ranking webpage to a new URL
- Simplifying the indexation process for search engines
- Improving user experience by ensuring visitors aren’t taken to duplicated or broken pages
What happens if you don’t use redirects?
The visitors end up with a 404 error. That’s not good news.
404 errors result in a poor user experience, which can lead to people leaving your website.
Similarly, what would happen if you have authority backlinks pointing to a specific page on your website and you decide to change its URL without setting up a redirect?
All of the authority earned from those backlinks would be lost, and your rankings could drop significantly.
When Should You Use Redirects
You should add redirects to a page if you have:
- Moved its URL
- Deleted the web page
- Added parent pages or category tags that have now affected the URLs
- Moved your site to a new domain
- Migrated your website to HTTPS from HTTP
- Merged duplicate web pages
The type of redirect you use for each use case is different. Contrary to a popular discussion in the SEO world, whether you use a 301 or 302 redirect doesn’t impact PageRank.
Google’s John Mueller says, “The good news is it doesn’t matter. Use the technically correct redirect type.”
If you have any more concerns, you can check Google’s HTTP status code documentation. The Google Search Central also has related videos to address your questions.
Why Check Redirects?
As we mentioned earlier, you need access to a redirect checker. But why?
Here are some reasons.
- User Tracking: Sometimes, redirects don’t directly go from one URL to another. Instead, they take a detour through various intermediate pages. For example, in affiliate marketing, the affiliate link might redirect to another page before reaching the actual destination. It gives the affiliate marketer information about how many people clicked on their link.
- Broken Links: Redirects are usually used when a page is no longer available. It means that if you have broken links on your website, they’re likely to redirect to another page. By regularly checking redirects, you can identify and fix broken links, which improves user experience and SEO.
- Redirect Loops: A redirect loop happens when a URL redirects to another page, which then redirects back to the original page, creating an infinite loop. Since this serves no purpose for users, it’s important to catch and fix redirect loops.
- Validation: A redirect checker can also help validate the effectiveness of your redirects. It can confirm if a redirect is working as intended and that the correct page is being redirected to.
More importantly, you need to check redirects to ensure you’re using the right type. Ideally, you should opt for server-side redirects since they’re more seamless and SEO-friendly.
A redirect checker lists all the redirect links on your web pages. Then, you can go through them individually to check their type and adjust accordingly.
How to Check Redirects With SEO Minion?
If you’re simply checking a single page for redirects and broken links, you can just click on every link on the page and check if it’s working. But when you’re conducting a site audit or checking a page with a lot of links, this process becomes tedious.
SEO Minion comes to the rescue.
You can use SEO Minion to highlight all broken links and redirects on any web page. Then, you can download those links in a spreadsheet and re-route, change, or remove them later.
Here’s how to use SEO Minion to check redirects on your web pages. For this example, we ran a search for ‘’How to register a business in the US’’ and checked the pages for redirects.
Step 1: Click ‘’Check Broken Links’’
Once you’re on the web page, go to the SEO Minion extension side bar and click ‘’Check Broken Links.’’

Step 2: Wait for the Link Search to Run
As soon as you click ‘’Check Broken Links,’’ you will see that SEO Minion has started searching for the links on the page and categorizing them into the following segments:
- Valid links — Working links that take the user to the right, functional pages
- 404 links — Broken links that take the user to a page that does not exist
- No domain links — Links that have no domain specified
- Empty links — Links that have no URL specified
- Redirects — Links that automatically take the user to a different URL
- Server errors — Links that result in a server error when clicked
- Unknown — Links with an unknown error

Step 3: Check the Redirects
SEO Minion will show you the number of redirects on the web page.
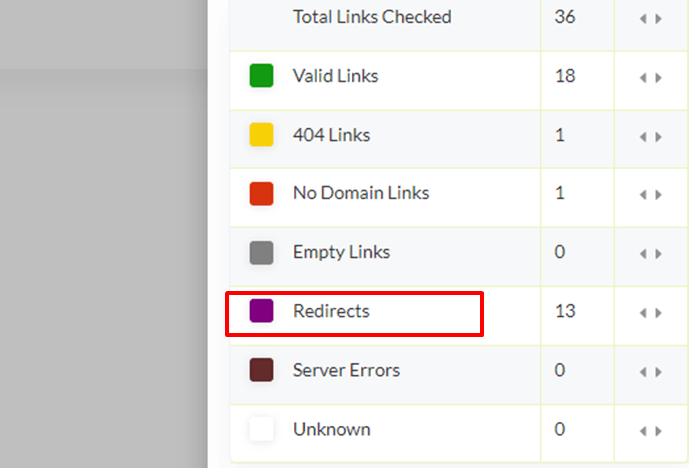
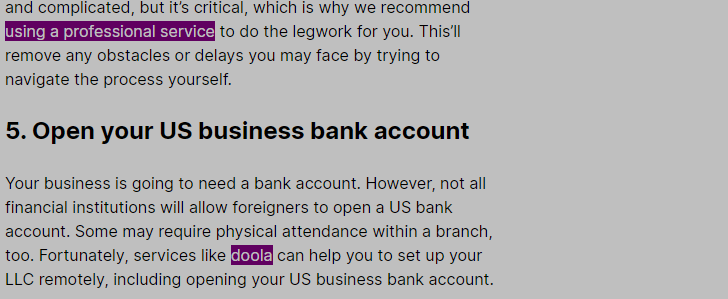
If you want to see where these links are on the page, click the arrow button in front of the redirects row. You will automatically be taken to the points where redirect links are present.
The redirect links are highlighted in purple.
There were 13 redirects on our webpage. Clicking on the arrows took us through all the redirect links on the page one by one.
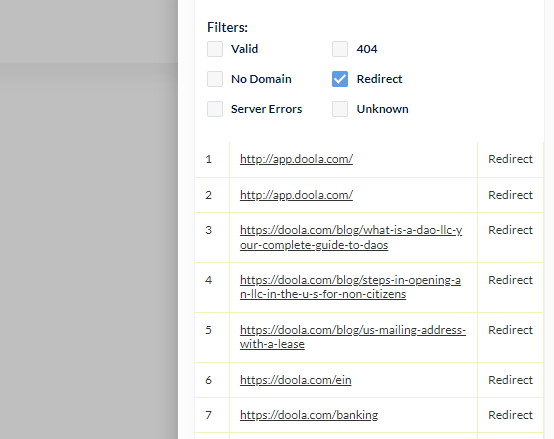
Step 4: Only Check Redirect Links
Underneath the section where you see the number of links of each type is a Filters section.
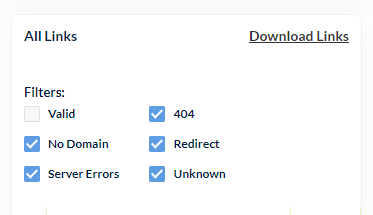
If you only want to see redirects, you can uncheck all other types of links. SEO Minion will then only highlight and show redirects on the web page.
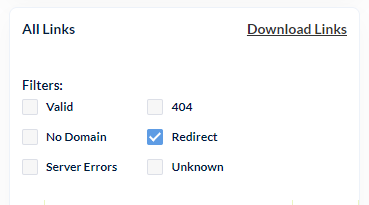
You’ll also see a list of all the redirect links at the bottom of the sidebar. From here, you can click on each link and go to its designated web page.
Step 5: Download All Links
Let’s say you want to check the links at a later time. You can simply download them from SEO Minion redirect checker. Click ‘’Download Links’’ to get the links in a spreadsheet format.
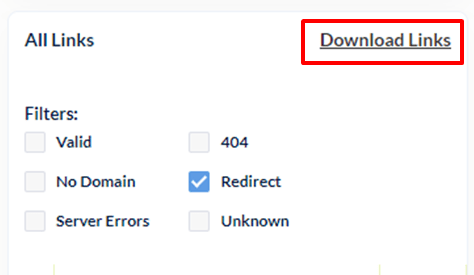
Since you only want to see the redirects, uncheck all other boxes. Then, download the links and you’ll have a spreadsheet with just the redirects. If you want all links from a page, you can check all boxes and click ‘’Download Links.’’
After you download the links, here’s how they’ll appear in the spreadsheet.
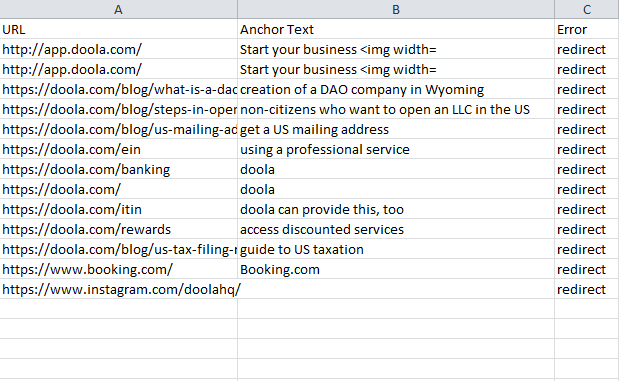
You can see the link URL along with its anchor text and the type of error it is.
Just to show you how redirect links would appear if you downloaded some other types of links too, we selected ‘’no domain,’’ ‘’server errors,’’ and ‘’404’’ to get an extensive broken link profile.
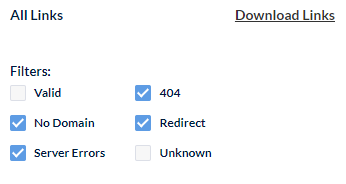
Again, you can see that the third column shows the error types. Our web page only had one broken and one no domain link with no server errors. We highlighted both these non-redirect links for better visibility in the spreadsheet.
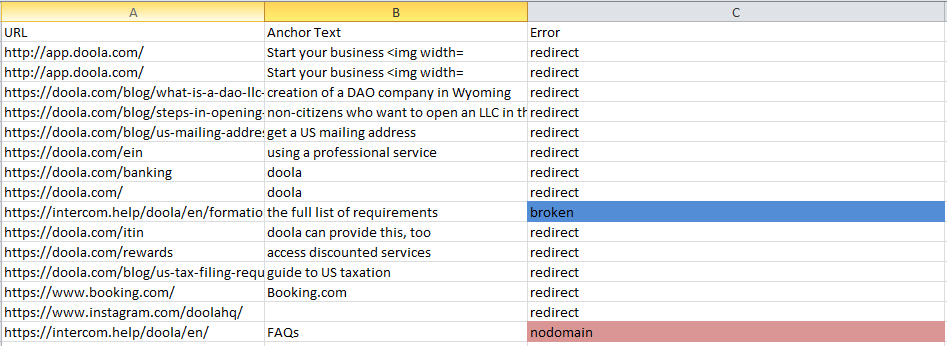
It’s up to you to decide if you want to view redirects individually or compare them with the number of other broken links in your webpages.
Now, you can follow the same steps with all other web pages on your site for an overall audit.
Types of Redirects
Broadly, redirects are of two types: permanent and temporary.
When you look at them, you can’t really tell the difference. But search engines can.
Permanent redirects are used when you’re sure you won’t be displaying the old page ever again.
Example: You’ve deleted a web page. So, you add a redirect link to a new page. It tells search engines that they can remove the old page from their index and replace it with the new one.
Temporary redirects are short-term. They only redirect the page for a specific time.
Example: You’re a banking site and are conducting maintenance. You redirect the users to a maintenance page. As soon as the maintenance is over, you can remove the redirect link and restore the original page.
On a lower tier, redirects are divided into three types based on their origin.
- HTTP Redirects
- Meta refresh redirects
- JavaScript redirects
HTTP Redirects
HTTP redirects are the most popular and widely used type of redirects. They are server-side redirects, meaning they occur at the server level before content is delivered to the user.
Here’s how it works:
- The user searches for a URL (old link).
- The server shows them the page for the redirect target (new URL).
HTTP redirects are seamless. The user doesn’t see the redirect happening; they only see the new page.
The server sends a code indicating that the old URL is no longer valid and that the new URL should be used instead. This code is known as a redirection code.
These redirection codes are 3xx HTTP codes. It means they have a code starting with 3.
Some of the most common redirection codes are 301, 302, 303, 307, and 308.
301 Redirects
301 redirects tell search engines that a page has permanently moved — they should update their index to reflect this change.
They’re a good option if you want to redirect authority to a new page. The authority generated through backlinks moves from the old URL to the new one.
Example: Your website has two pages about the best movies from the 1990s. The second page is more updated and better optimized for search engines. You delete the first page and redirect users to the second one.
302 Redirects
302 redirects are temporary. If you use a 302 redirect, Google will still index the redirected page. However, the traffic or link juice created by backlinks won’t pass onto the new page.
You can use 302 redirects if you’ve:
- Temporary moved your website
- Created a temporary landing page for A/B testing for web design
302 redirects are also used when websites are down for maintenance. Only use this redirect if you’ll bring the original URL back at some point.
Example: You want to test two different versions of your homepage design. Create a temporary landing page and split traffic between the two designs to see which one performs better.
303 Redirects
A 303 redirect takes users to a subsequent page that doesn’t have the same content as the original page.
It’s commonly used on web pages where users have to submit forms or some sort of information. 303 redirects prevent refreshing and bookmarking for pages with one-time-only data.
Example: A user enters their credit card details to subscribe to a service. After the payment is completed, they’re redirected to a processing page.
307 Redirects
The 307 redirect is also temporary. It takes users to a different page when the original web page is not available due to content updates or site maintenance.
Like 303, you should use 307 redirects for actions that involve data submissions. The simple difference between both is that 303 changes the method of original request submission from POST to GET, while 307 preserves the original method.
Example: You hosted a webinar that had a dedicated landing page on your website. After the event ends, you need to gather feedback. But you don’t want the visitors to go directly to the webinar page during the analysis phase. Add a 307 redirect to take them to a summary page where they can leave feedback.
308 Redirects
A 308 redirect is like a 301 redirect, and it’s permanent.
308 redirects are useful when you’re changing a website’s URL or migrating to a new domain name. They tell search engines to transfer the old site’s ranking and authority to the new web address.
Example: Your company is rebranding and changing its domain name. You want to redirect all the traffic from the old domain to the new one, keeping your SEO ranking intact. Use a 308 redirect.
Meta Refresh Redirects
Meta refresh redirects are executed on the client-side through HTML code. Compared to HTTP redirects, they’re a bit slower. So, they can affect user experience.
Google recommends using them when you’re unable to use server-side redirects.
Meta refresh redirects are further of two types.
- Instant: These redirects are triggered immediately after the page loads. It’s done by including a refresh tag in the HTML code.
- Delayed: These redirects are delayed by a specific amount of time after the page loads. You can select the delay time in seconds.
JavaScript Redirects
JavaScript redirects are also client-side, and they’re executed by JavaScript code. Both JavaScript and meta refresh redirects aren’t SEO-friendly.
They can prevent search engines from indexing the right page.
In theory, JavaScript redirects work like 301 redirects. However, there’s no guarantee that search engines will follow them.
They might not give the new page the ranking and authority of the old one. So, use these redirects at your own risk, and always prefer server-side redirects whenever possible.
Conclusion
By now, you should know about different types of redirects and how to check them. Using SEO Minion as your dedicated redirect checker can help you validate redirects and identify redirect loops.
Catching these issues early on can help you avoid ranking and traffic losses. Remember to use server-side redirects whenever possible and use other types only as a last resort.


